A while back, I wrote a post on integrating NetScaler nFactor with Duo for 2 factor authentication. The implementation in that post included some workarounds for two limitations between nFactor and Duo. These workarounds were great, but they made the configuration more complicated. They also had some limitations. The good news is that we don’t need them anymore.
The two workarounds that we needed were:
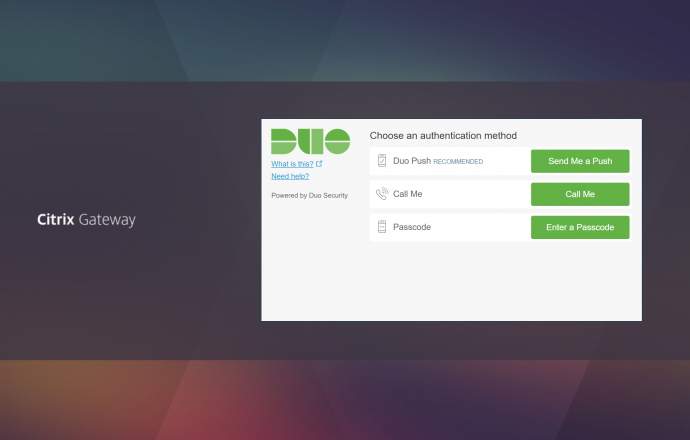
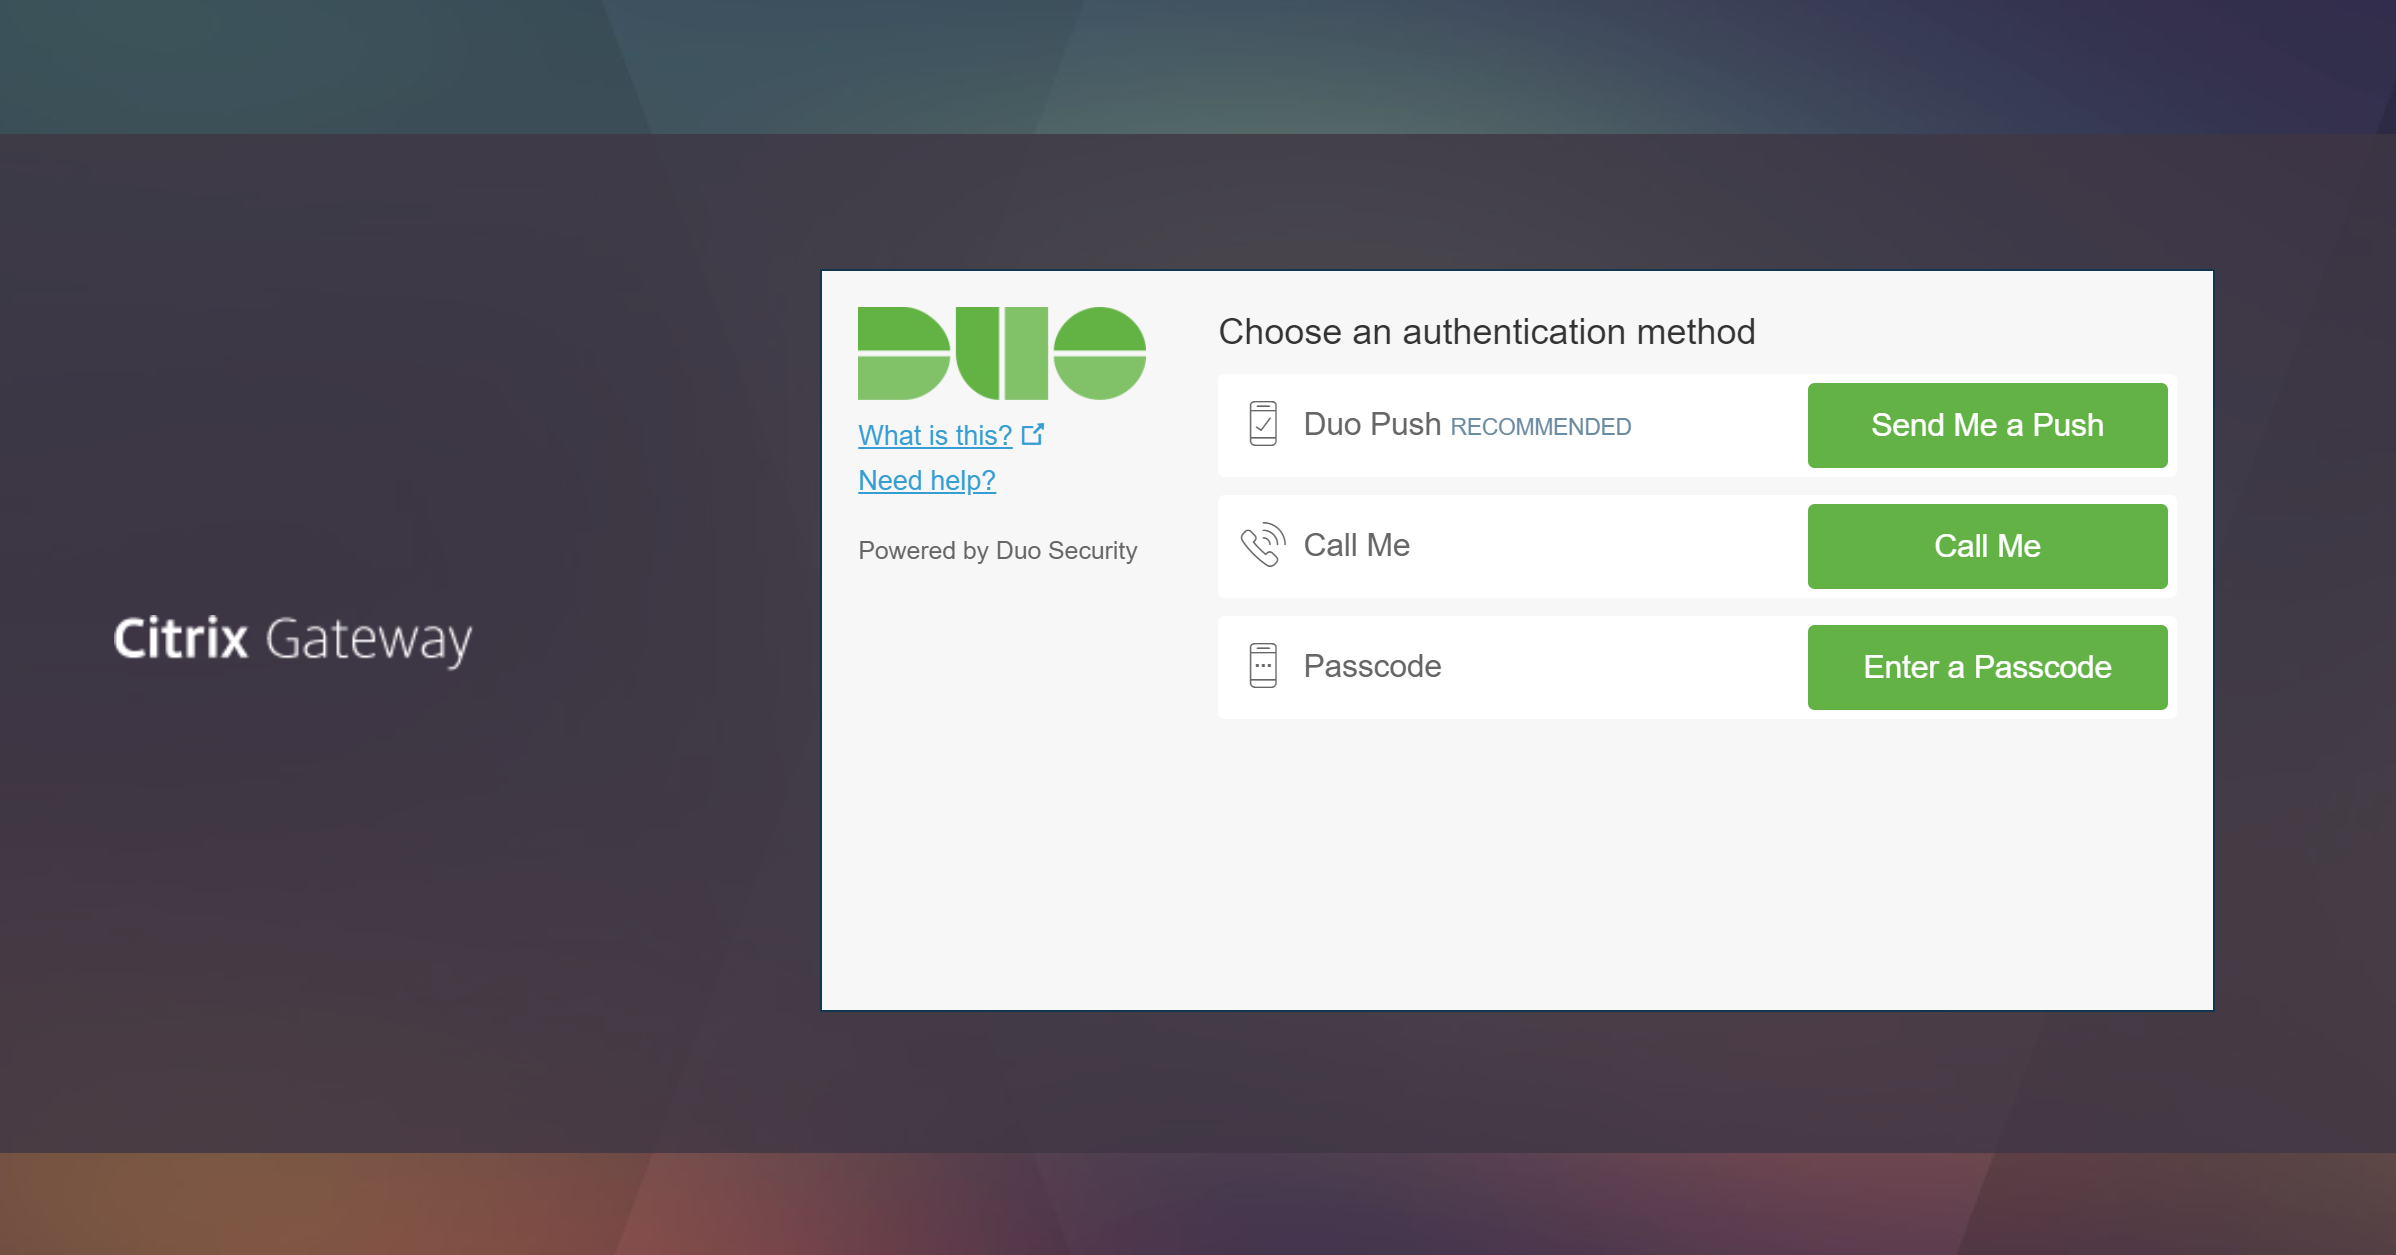
- nFactor could not display the Duo “Three Button” iframe (the one in the image at the top of this page) that allows users to choose their authentication method. As a result, Jacob at Serioustek and I developed a new nFactor Login Schema to present the options via radio buttons.
- Receiver and the NetScaler Gateway client could not display custom nFactor Login Schemas. So, the original post included policies to skip the user selection prompt for those clients and just use the user’s Duo default setting.
Since that post, there have been a few changes from Citrix and Duo that make things a bit easier.
First, both Receiver and the NetScaler Gateway client now support displaying Login Schemas. The workaround policies for those clients are no longer needed.
Second, Duo recently updated their iframe code to support the RFWebUI theme. Although the officially documented integration still uses Basic Authentication policies instead of nFactor, it turns out that the changes they’ve made allow the iframe to work with nFactor.
So in this post, I’m going to show how to create a Duo integrated nFactor logon flow using Duo’s three button iframe. If you haven’t read my first post on this, you may want to start there since this configuration will be very similar. The only real changes are to the Duo pieces.
Before I start with the description, I want to point out that the radio button method in the other post still works. There’s some pros and cons to either method:
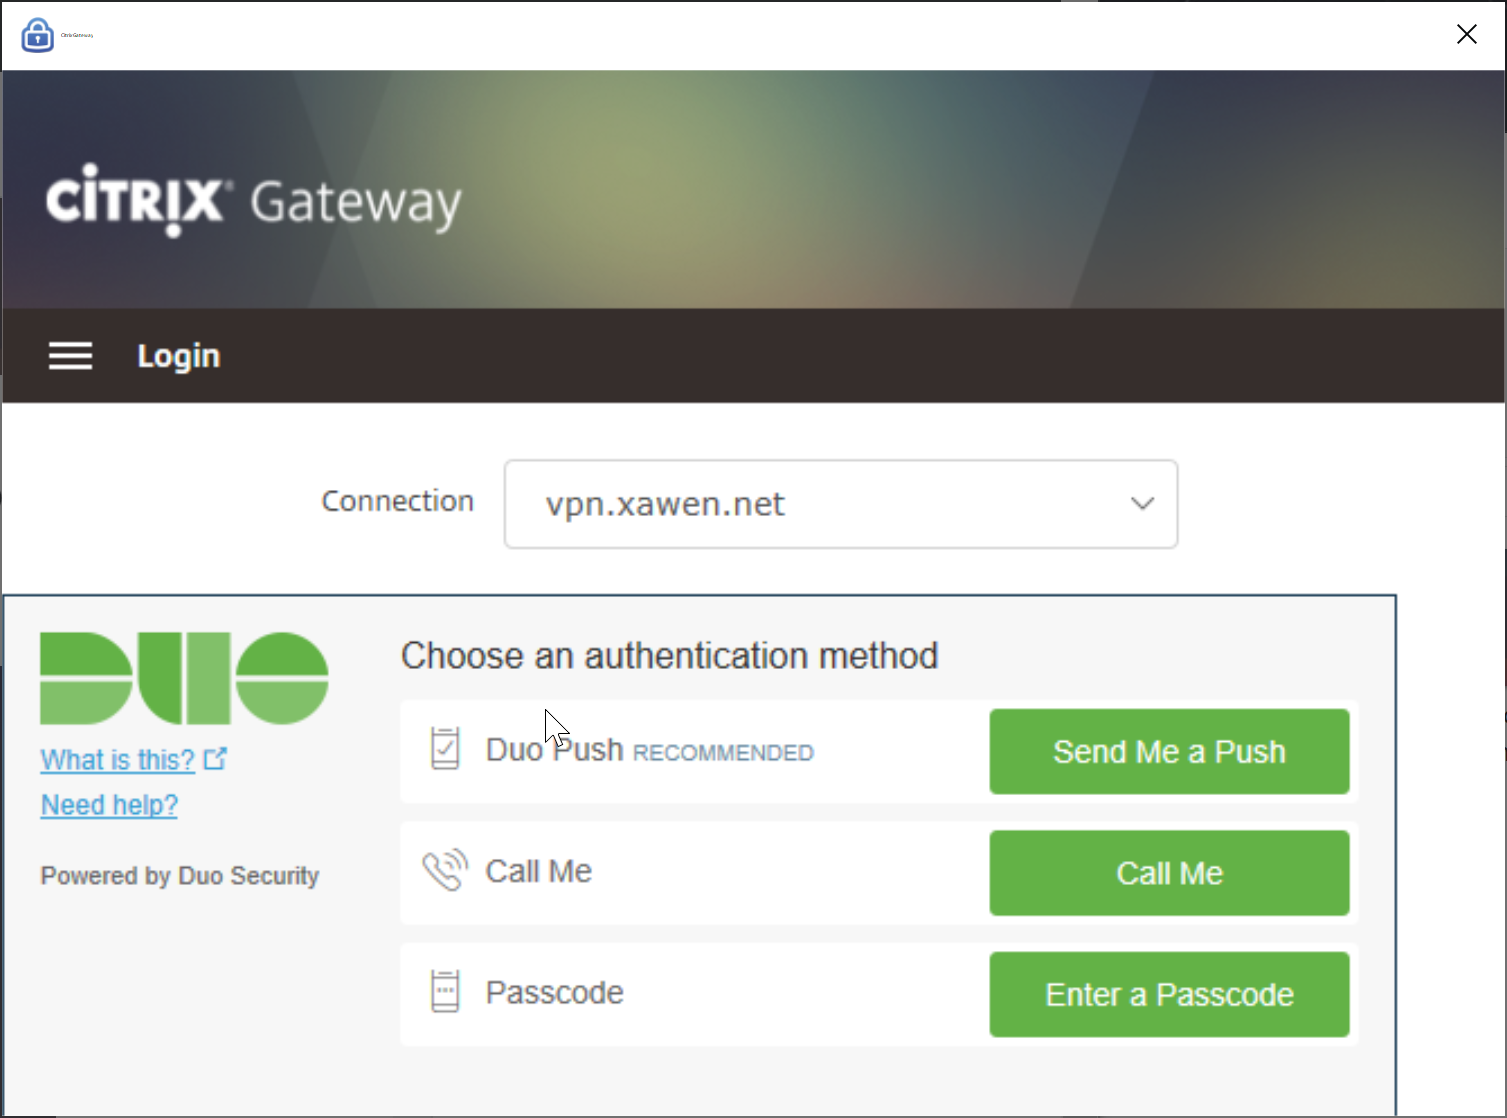
- The radio button method is more compact. It will render better in the Receiver and Gateway clients than the iframe, which can’t be resized (see the screenshot below).
- The iframe is rendered on the Duo servers, then passed to the NetScaler. This can cause a short delay before the iframe is displayed. The radio buttons are rendered locally, so they show up instantly.
- If your users have multiple devices registered with Duo, the iframe is the only way to display the dropdown to select the device. The radio button method can only use the user’s default device.
Overview
Ok, let’s set it up. This flow will be very similar to the one in the original post:
- All users are prompted for Active Directory credentials.
- Members of a specific AD group will be prompted to select a Duo prompt method, then Duo authenticated.
- Non-group members will be logged in with only AD credentials.
As with the original post, this configuration will be done in the web GUI instead of the command line. Also, in this example we’re building things from the bottom up. Actions > Policies > Policy Label > etc… This minimizes the amount of moving back and forth between modules. But, it can make it hard to understand why we’re doing certain steps. I recommend reading the entire process to see how it fits together before doing it.
Prerequisites
I’m assuming you are starting with the following in place:
- Existing NetScaler ADC with Enterprise or Platinum licensing
- Working Unified Gateway vServer
- Functional Active Directory
- Fully configured Duo account with existing users
- Duo Authentication Proxy installed with default configuration
Planning
Before starting, it will save some time if you get the following items ready:
- Active Directory account to use as a LDAP bind account. You will need the Distinguished Name (DN).
- Create (or pick and existing) Active Directory group that will contain the 2 factor auth enabled users.
- Retrieve your ikey, skey and API host from your Duo account.
- Choose a RADIUS secret password.
Duo Authentication Proxy Configuration
First, we’ll configure the Duo Authentication Proxy. This is going to act as a RADIUS server for the NetScaler. Since we’re using the native iframe, we’ll only configure one RADIUS servers (ports) on the proxy. When called, it will reach back to Duo to render the iframe.
Note that in this example, we’re using a single Auth Proxy server. For a production configuration you should consider creating two (or more) and load balancing them with a LB vServer and appropriate monitors.
On the server where you installed the proxy, edit the Duo Auth Proxy configuration file (authproxy.cfg) and enter (replace everything in <> brackets with the values for your environment):
[duo_only_client]
[radius_server_iframe]
 type=citrix_netscaler_rfwebui
 ikey=<your Duo ikey>
 skey=<your Duo skey>
 api_host=<your Duo api host>
 failmode=safe
 client=duo_only_client
 radius_ip_1=<NetScaler NSIP>
 radius_secret_1=<RADIUS Secret Password>
 port=18124
Now restart the Duo Authentication Proxy Windows service and make sure it starts back up. If it refuses to restart, there is a mistake in your config file. The authproxy.log file will have clues where to look.
Authentication Actions
Next, we’ll create the actions for our authentication sources.
First, a LDAP action for Active Directory. Note that in this example, we’re pointing directly at a Domain Controller. For a production configuration, we should be creating a load balanced LDAP vServer with LDAPS and pointing at that. Navigate to Security > AAA- Application Traffic > Policies > Authentication > Advanced Policies > Action > LDAP. Click add to create a new LDAP action and fill in the following:
- Name: DomainName-LDAP-Action
- Server Name / Server IP: Server IP (Name can be used if you prefer)
- IP Address: Address of a Domain Controller
- Server Type: AD
- Base DN: DN for LDAP search root (dc=domain,dc=com)
- Administrator Bind DN: DN for your LDAP bind account
- Administrator Password: Password for your LDAP bind account
- Server Logon Name Attribute: sAMAccountName
- Group Attribute: memberOf
- Sub Attribute Name: cn
Next, a RADIUS actions for the Duo iframe. Navigate to Security > AAA- Application Traffic > Policies > Authentication > Advanced Policies > Action > RADIUS. Click add to create a new RADIUS action and fill in the following:
- Name: Duo-RADIUS-iframe-Action
- Server Name / Server IP: Server IP (Name can be used if you prefer)
- IP Address: Address of server hosting Duo Authentication Proxy
- Port: 18124
- Secret Key: your chosen RADIUS secret password
- Under More
- Leave the Password Encoding as PAP. Note that this is a change from the original post where we used mschapv2. If you do not select PAP here, you will get the following error in the Duo authproxy.log:
Only the PAP with a Shared Secret format is supported. Is the system communicating with the Authentication Proxy using CHAP or MSCHAPv2 instead?
Authentication Policies
Now, we’ll build the authentication policies that will be bound to the Policy Labels. Navigate to Security > AAA- Application Traffic > Policies > Authentication > Advanced Policies > Policy.
First we’ll create the LDAP authentication policy. Click Add and create the following policy:
- Name: LDAP-DomainName
- Action Type: LDAP
- Action: DomainName-LDAP-Action
- Expression: true
Now, we need a policy to only check for membership to our 2 factor group:
- Name: NoAuth_Duo
- Action Type: NO_AUTHN
- Expression: HTTP.REQ.USER.IS_MEMBER_OF(“Your2FactorADGroup”)
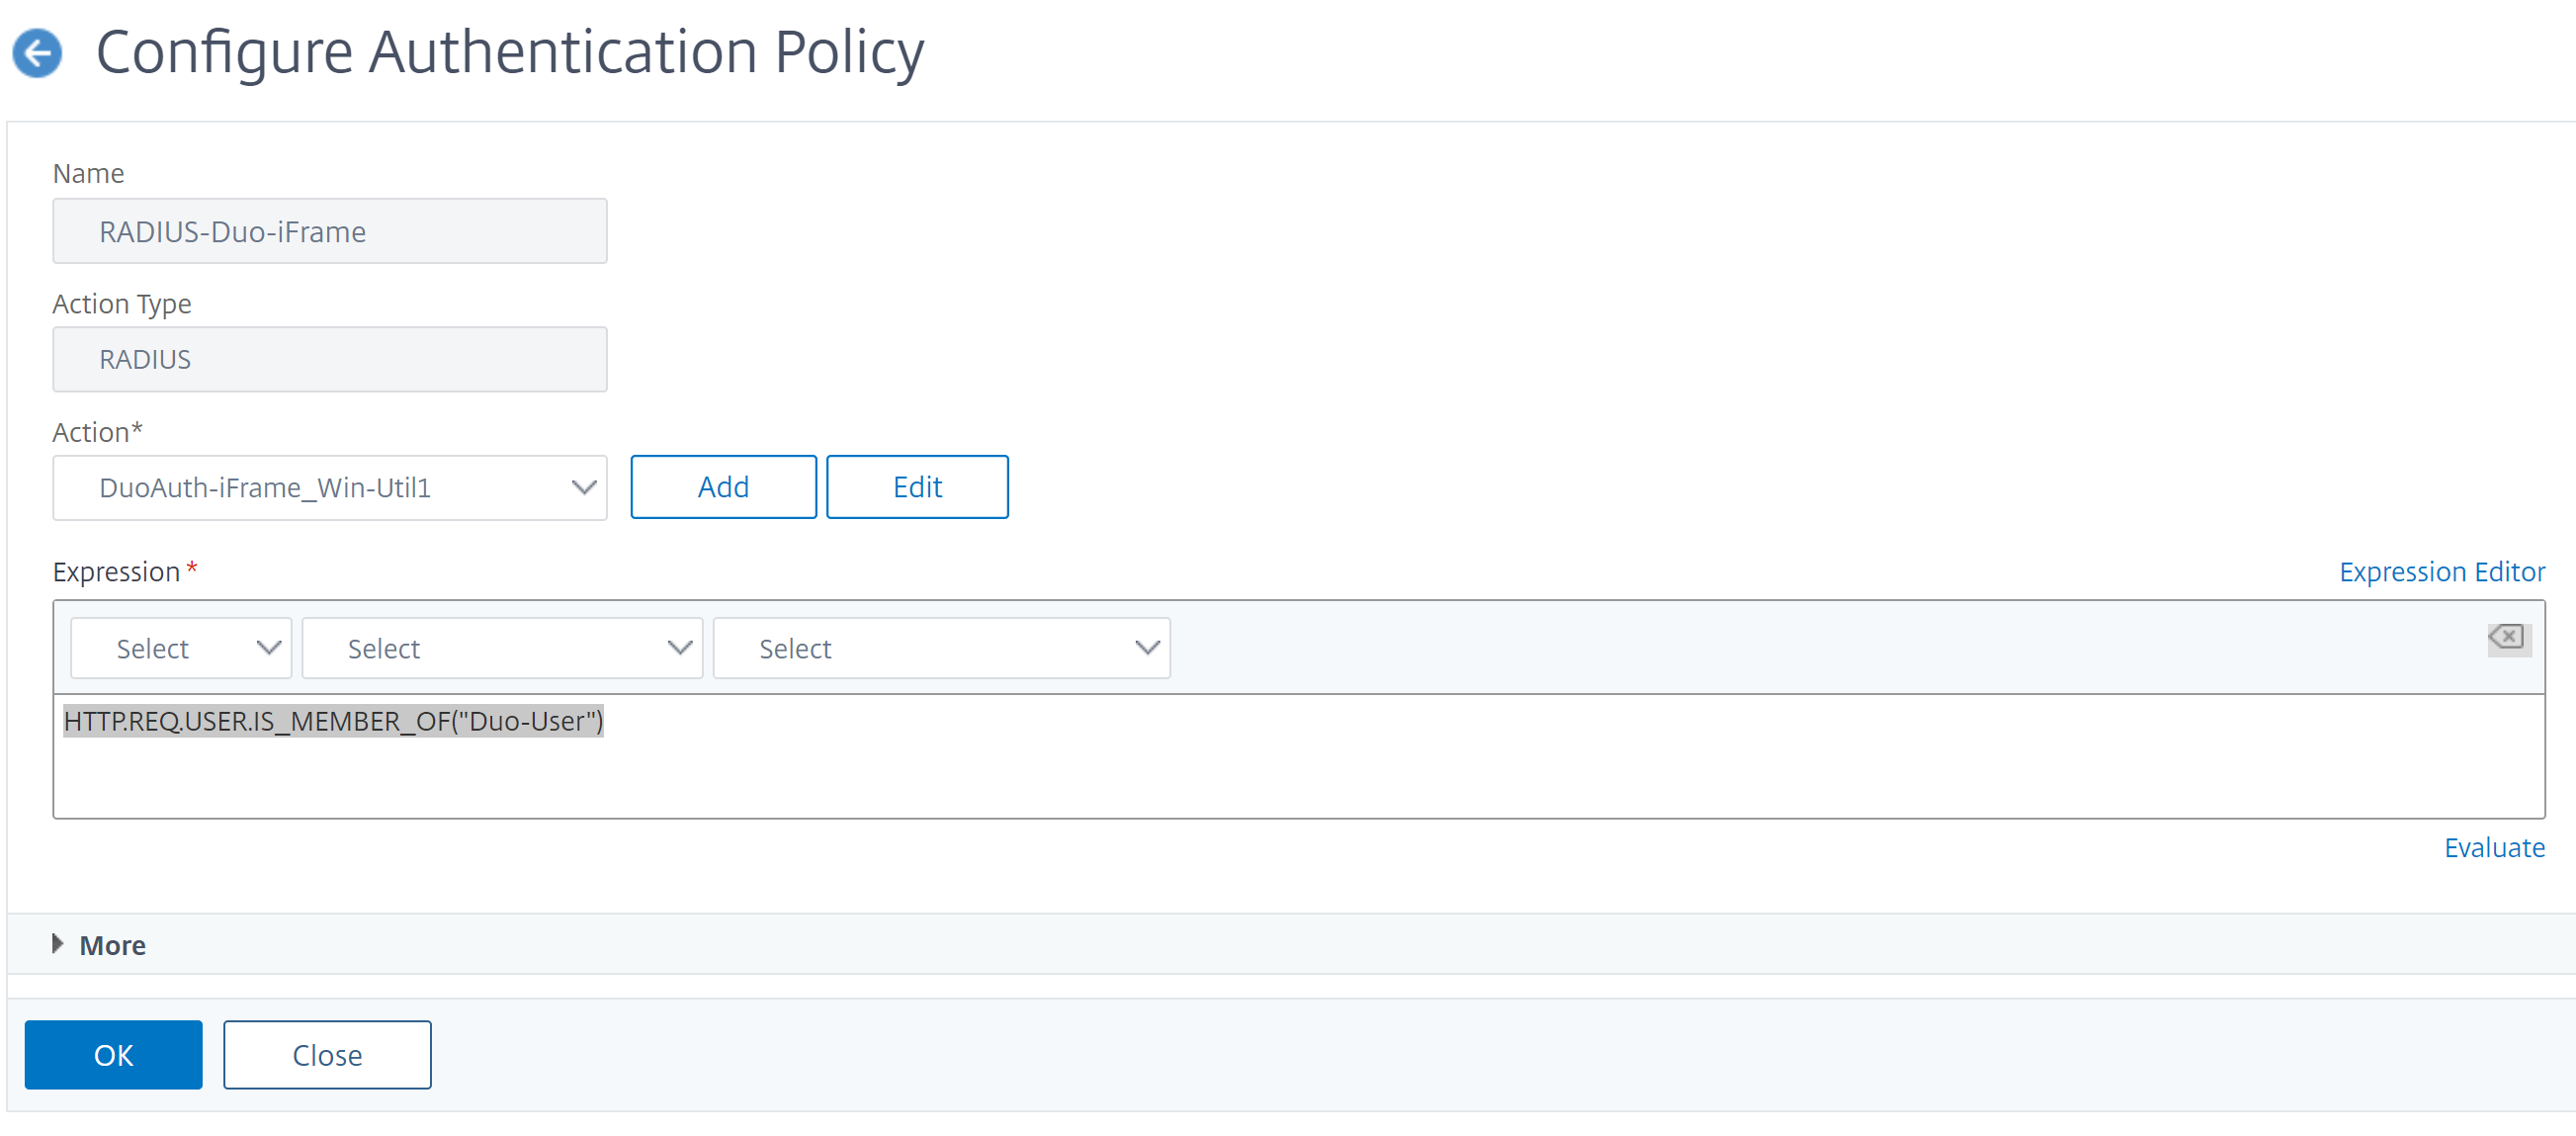
Next, we need a policy for our Duo iframe.
- Name: Radius-Duo-iFrame
- Type: RADIUS
- Action: Duo-RADIUS-iFrame-Action
- Expression: HTTP.REQ.USER.IS_MEMBER_OF(“Your2FactorADGroup”)
Last, create a policy that allows login with no auth. This policy will be used at the end of our policy chains:
- Name: NoAuth
- Action Type: NO_AUTHN
- Expression: true
Login Schema Profiles
Now we’ll build the Login Schema Profiles that will define the appearance of each login screen. Navigate to Security > AAA – Application Traffic > Login Schema > Profiles tab
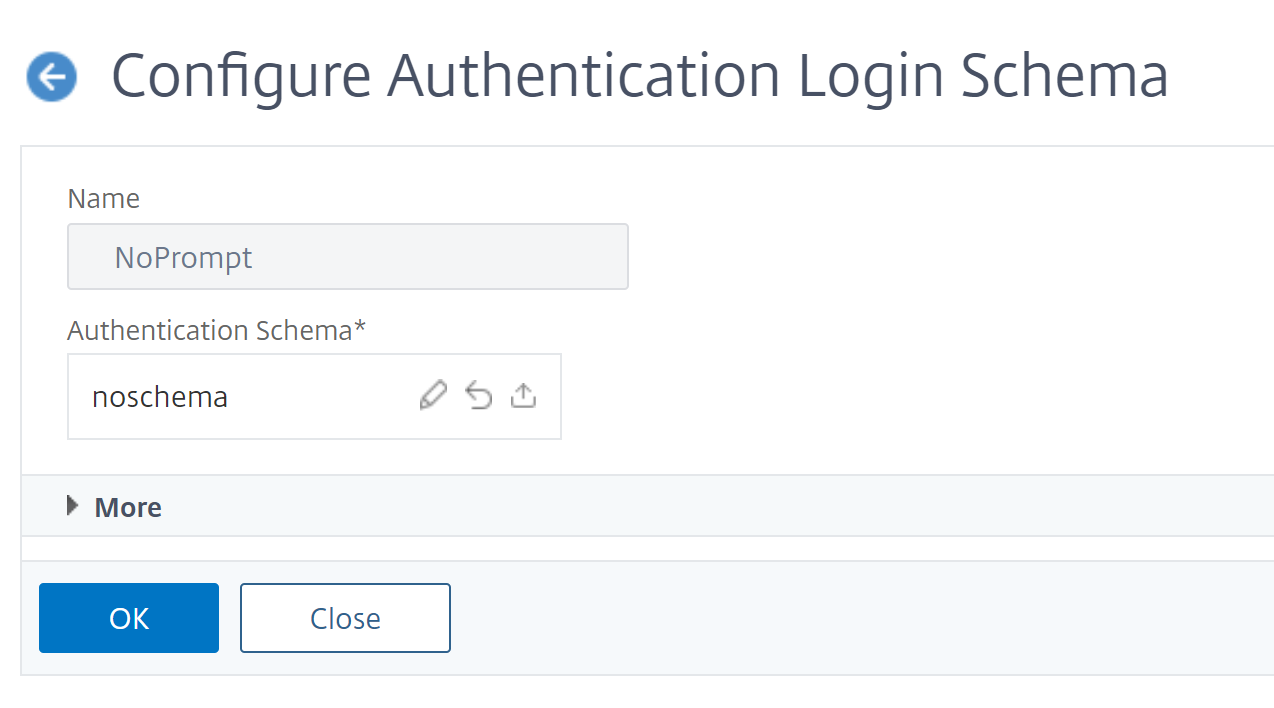
First up, we need a blank screen for login steps where we don’t want anything shown to the user. Technically there’s a built in Profile for this called LSCHEMA_INT, but I like to create one with a friendly name so it’s obvious what it’s doing. Click Add and create this Profile:
- Name: NoPrompt
- Authentication Schema: noschema
Next, we need a Profile with a User Name and Password field. Fortunately, there’s a built schema for this. Create a new policy:
- Name: UsernamePassword
- Authentication Schema:

Policy Labels
Now we’ll build the Policy Labels for our authentication “chain.” Our auth logic looks like this:
- LDAP Auth
- Check for AD group membership and client type
- Ask user for Duo prompt type (if AD group member and not using Receiver or NetScaler VPN)
- Prompt user with Duo using selected method – or push if client is Receiver or NetScaler VPN
Since LDAP is the first authentication step, it will be defined directly in the AAA vServer and won’t need a Policy Label. We can skip that for now.
Next, we’ll create the Policy Label that will check the AD group and client type. Create the following policy:
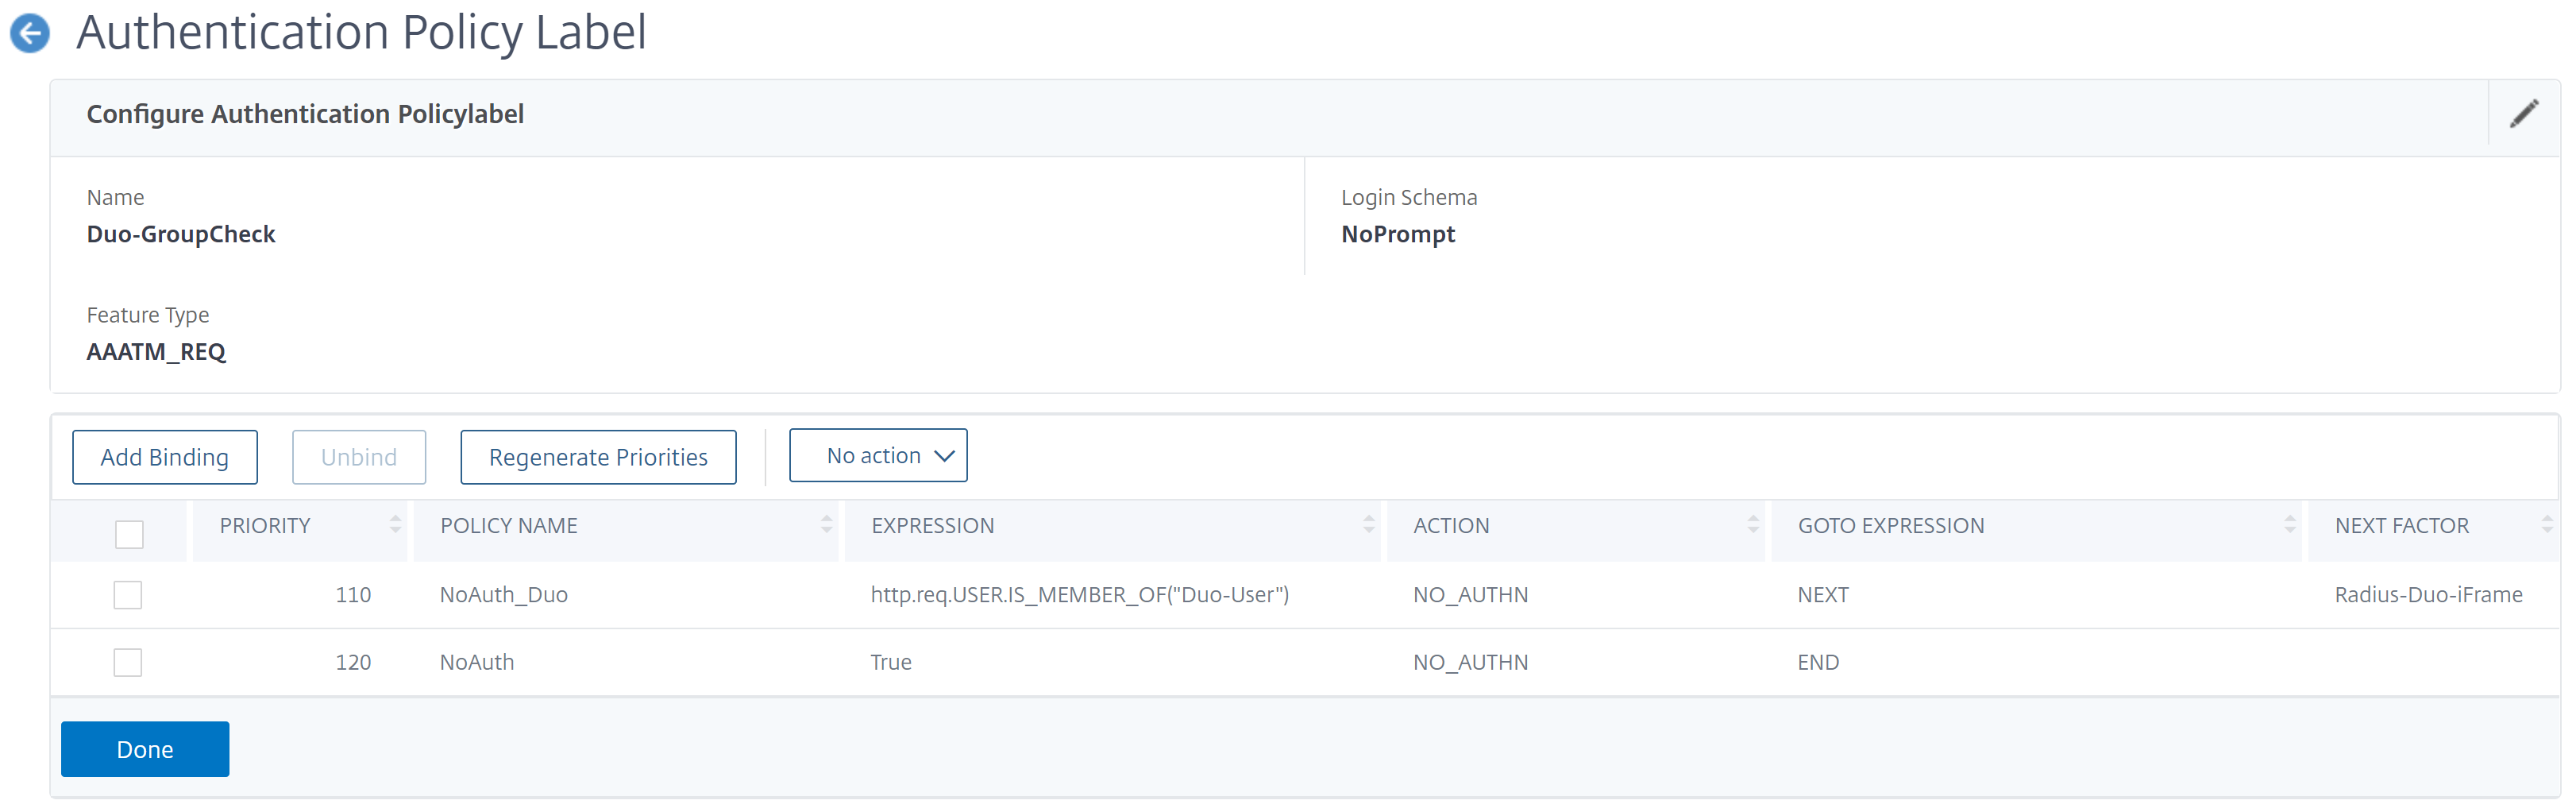
- Name: Duo-GroupCheck
- Login Schema: NoPrompt
- Feature Type: AAATM_REQ
- Click Create
- Policy Binding – Select Policy: NoAuth_Duo
- Goto Expression: Next
- Select Next Factor: Radius-Duo-iFrame
- Click Add Binding
- Select Policy: NoAuth
- Goto Expression: End
- Next Factor: <None>
Last, we’ll create the Policy Label that will display the iframe. Create the following policy:

Note the Action names in this screenshot differ from the settings below. Just a difference in my lab’s naming conventions.
- Name: Radius-Duo-iFrame
- Login Schema: NoPrompt
- Feature Type: AAATM_REQ
- Click Create
- Policy Binding – Select Policy: Radius-Duo-iFrame
- Goto Expression: End
- Select Next Factor: <None>
- Click Add Binding
- Policy Binding – Select Policy: NoAuth
- Goto Expression: Next
- Select Next Factor: <None>
AAA vServer
Now we’ll create the AAA vServer that will handle the authentication requests. In this case, we’re going to use a non-addressable (0.0.0.0) vServer. All requests to the vServer will go through the Unified Gateway DNS address.
Navigate to Security > AAA – Application Traffic > Virtual Server. Click Add and create the following:
- Name: nFactor-AAA
- IP Address Type: Non Addressable
- Click Create
- Click on “No Server Certificate” and bind your Unified Gateway certificate
- Click Continue twice (skip the auth policies for now)
Now we’ll bind the first Authentication factor to the AAA vServer. This will look a lot like creating a policy label. First, under Advanced Authentication Policies click on “No Authentication Policy” and create the following binding:

- Select Policy: LDAP-DomainName
- Goto Expression: Next
- Select Next Factor: Duo-GroupCheck
Next, bind the UsernamePassword Login Schema to the AAA vServer. On the right under Advanced Settings, click “+ Login Schemas” then scroll to the bottom of the page and click on “No Login Schema.” Create the following binding:

- Select Policy: UsernamePassword
Authentication Profile
We need to create a Authentication Profile for the new AAA vServer. Navigate to Security > AAA – Application Traffic > Authentication Profile and click Add. Create the following profile:
- Name: nFactor-AAA
- Authentication Host: <Unified Gateway vServer DNS Address>
- Choose Virtual Server Type: Authentication Virtual Server
- Authentication Virtual Server: nFactor-AAA
Unified Gateway Authentication Settings
The last thing we need to do is bind the AAA vServer to your Unified Gateway. Navigate to NetScaler Gateway > Virtual Servers and click on the Unified Gateway vServer. Remove any existing Basic Authentication policies or Authentication Profiles. Click the pencil icon on “Authentication Profile” and choose nFactor-AAA. Click OK and verify the profile is bound.

Results
Any user that logs in will first get the AD prompt:
Next, any user that is a member of our Duo Users AD group will see the Duo Three Button prompt.
This will also show up in the Receiver and NetScaler Gateway clients. The iFrame is rendered by the Duo servers, and doesn’t resize, so it’s a little cramped. But the entire window does fit in both clients.
Other Notes
That’s it. Just one note:
- Because the iFrame is rendered on the Duo servers, it can take a few seconds to display. During that delay, the user gets no visual feedback that something is still loading. The frame does get cached, so the delay is only periodic. However, it can be confusing if the users aren’t told about it ahead of time.
Hi Jason, i followed your article to setup Duo radio button earlier. Now i wanted to test iFrame and implement it for a uniform user experience. However, i am getting the following error on Auth proxy.
{“username”: “username”, “status”: “Error”, “client_ip”: null, “server_section”: “radius_server_iframe”, “timestamp”: “2019-09-25T06:56:44.597000Z”, “auth_stage”: “Primary authentication”, “factor”: null, “msg”: “No password provided”}
Password encoding was the issue, after changing it to PAP its working now. Thanks for the helpful post.
Great article. I have more simple needs, just username password then DUO iframe. I used the wizard to create it, using load balanced radius VS. No matter what I do with auth policies and noschema I am getting the second password form that is overlayed by the iframe. This is noticeable when you succeed with the Duo auth and then see the page with password and loads of ********* in it. It all works just looks odd. Is there a way to remove this unneeded second password page.
Hello,
With help of your article have managed to get this working through a browser, but when using the gateway plugin post Ad authentication, I am not getting the iFrame, just getting blank field & submit button (I tried entering “push” this does not work)
Any ideas? I can send a screenshot if it helps
The single text box with a submit button is what the client shows when it’s waiting for the iFrame to render. That’s what I mention in the Other Notes section of the article. Does it stay on that screen for a long time? I’ve only ever seen it for a couple seconds (5-7) while waiting for the frame.
Thanks for this article, Jason.
I have nearly got this working. First major hurdle was finding I had to implement the following fix from Citrix – https://support.citrix.com/article/CTX232615 – as the final iframe prompting for push, sms, etc would never actually show.
However once the push is accepted I get one of those “An error has occured in the script on this page.” error messages relating to – https://api-1234567.duosecurity.com/frame/static/js/lib/jquery-postmessage.min.js?v=98c73
Any thoughts?
Thanks
Hello
I am getting the same or similar script error, did you manage to resolve this?
Line:9
Char: 174
Error: Invalid Argument
Code:0
URL: https://api-xxxxxxx.duosecurity.com/frame/static/js/lib/jquery-postmessage.min.js?v=98c73
Regards
Farouk
There have been some updates to the AAA engine in some of the recent ADC releases. Sounds like something may have broken there. I will take a look at the script and see what needs to be updated.
hello – was there a solution you found for this? im on page 70 of google at this point! lol
Can confirm I’m also getting the same Invalid argument error! Very frustrating 🙂 Line 9: Char 174
I am having the same issue. Currently working with Citrix Support…they say it’s not supported. I just created a case with DUO support now. Fingers crossed!
What version of the Netscaler are you running?
We are running 12.1-57.18.
Matt / Justin: Where are you getting the error. I just tried this on multiple builds of 13.0 and it’s working normally. I need to deploy a 12.1 appliance to test if it’s a 12.1 vs 13.0 issue.
Hi Jason,
I am running 12.1-57.18. MacOS/iOS devices work great, just the Windows Client is acting this way. I get to the login prompt and login, it then prompts for Duo Method, I select Push, I get the prompt on my phone, I select accept…Script Error on the gateway client. I wonder if it has something to do with IE. I will let you know what Duo support says.
Thanks,
Matt J.
Forgot to mention, I am running DUO AUTH PROXY 5.1.0 on RHEL 7.
Hello I am curious if you found a solution to the invalid arg error message. Ive been troubleshooting this for a bit now and just came across these comments. The error pops up *only* when using nsload, vs loading the auth window in a web page.
I have got this configured and Setup. I appreciate the article. But when I activate the Authentication profile on the Gateway Virtual Server, it prompts for the Credentials, and then pops the DUO. But then returns a Cannot Complete the request, like it can’t find the Storefronts, but if I revert back to the Basic Authentication, it works with no issues. Any Ideas to Help?